Creating a bootable Windows 10 USB drive on a Mac is a straightforward process. This method is especially useful if you don’t have access to a Windows PC. Follow the step-by-step guide below to create your bootable USB drive.
Prerequisites:
Before you begin, make sure you have the following:
- USB Flash Drive: A USB drive with at least 8GB of storage. Backup any important data as this process will erase all contents of the drive.
- Windows 10 ISO File: Download the official Windows 10 ISO file from Microsoft’s website and select the appropriate version (32-bit or 64-bit) for your device.
Step-by-Step Guide
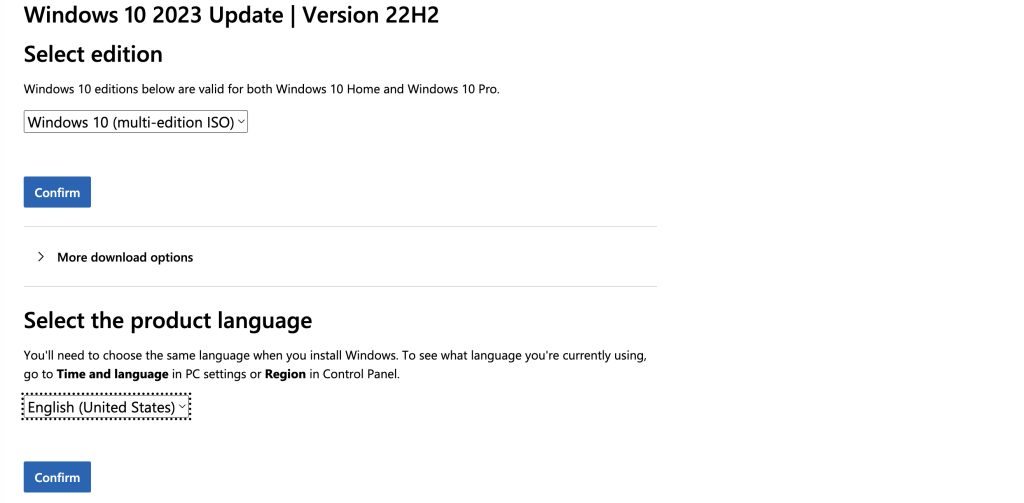
Step 1: Download the Windows 10 ISO File
- Visit Microsoft’s official website and download the correct version of Windows 10 for your system.
Step 2: Insert the USB Drive
- Plug your USB flash drive into your Mac.

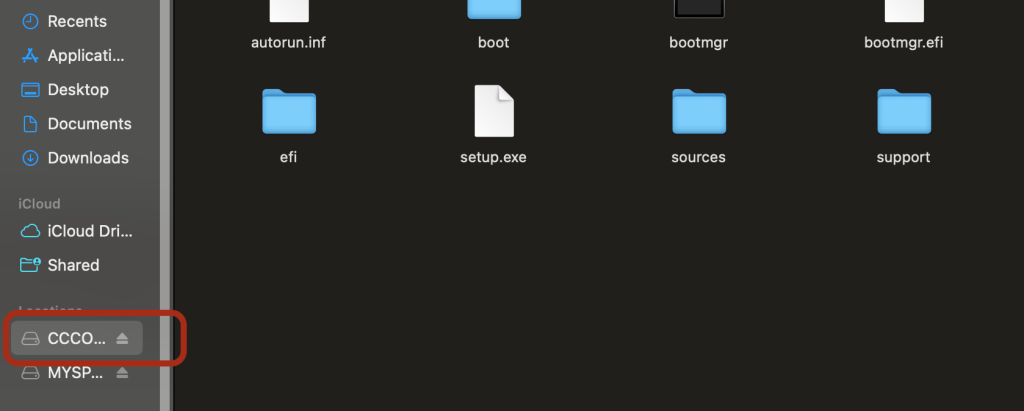
Step 3: Mount the Windows 10 ISO File
- Double-click the downloaded ISO file to mount it.
- Once mounted, you should see a new volume named something like CCCOMA_X64FRE_EN-US_DV9 in the Finder’s left-hand panel under “Locations.”
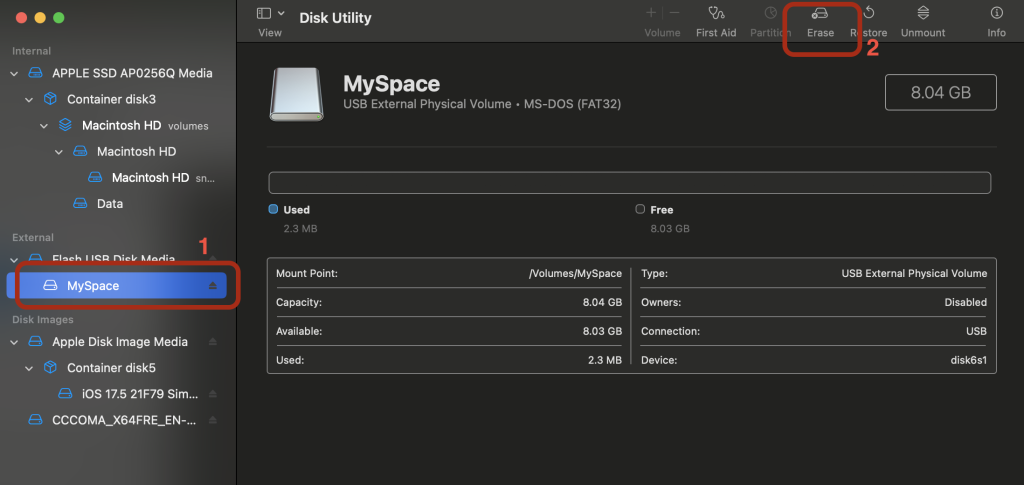
Step 4: Format the USB Drive Using Disk Utility
- Open Disk Utility (search for it using Spotlight
Cmd + Spaceand type “Disk Utility”). - Click on View in the top-left menu and select Show All Devices.
- Select your USB drive from the External section.
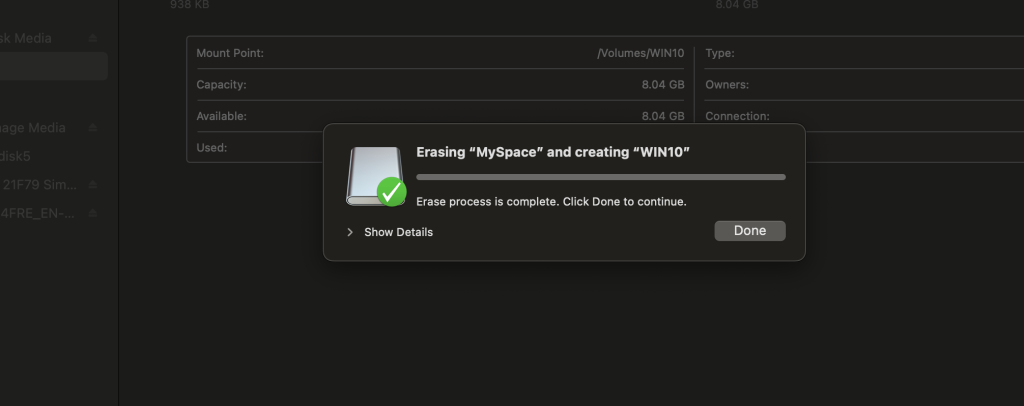
- Click Erase (top-right corner).
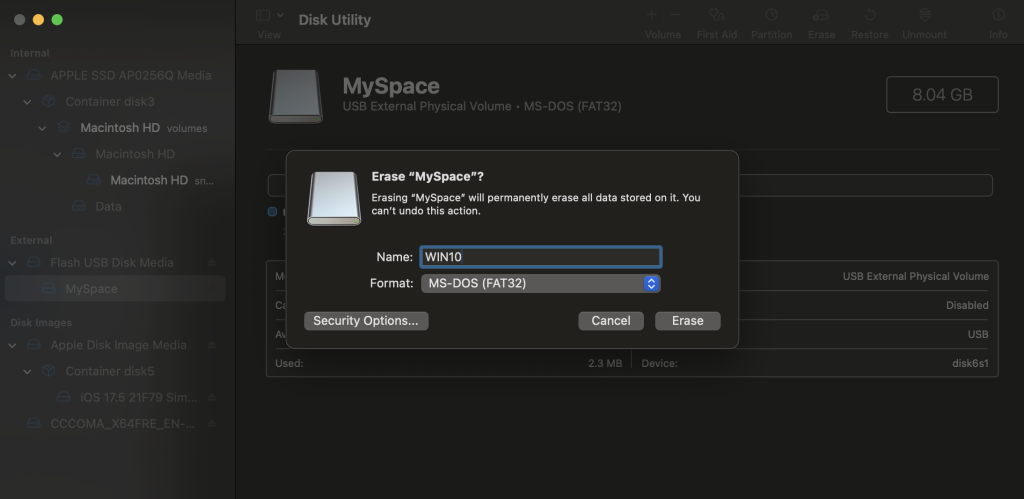
- In the pop-up window, enter a name for the drive (e.g.,
WIN10) and select:- Format:
MS-DOS (FAT32) - Scheme:
Master Boot Record (MBR)
- Format:
- Click Erase to format the drive.
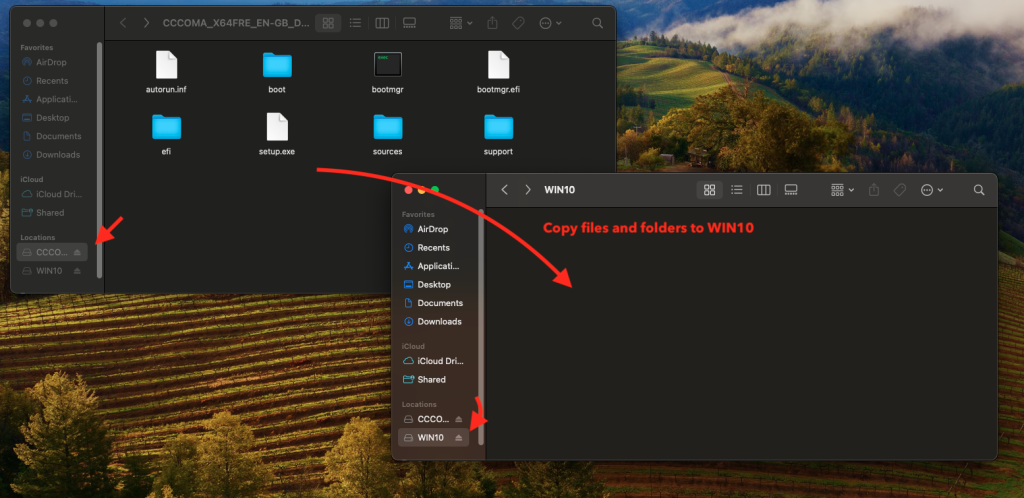
Step 5: Copy Windows Installation Files
- Open the formatted USB drive (
WIN10). - Also, open the mounted Windows ISO volume (
CCCOMA_X64FRE_EN-US_DV9). - Copy all files and folders from the ISO to the USB except the
sourcesfolder.

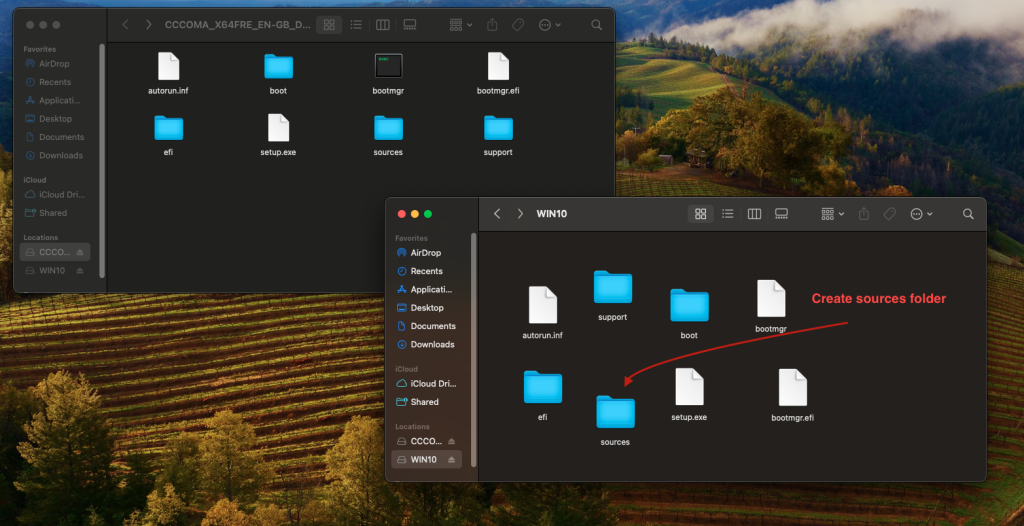
Step 6: Handle the “sources” Folder Separately
- Inside the USB (
WIN10), create a new folder namedsources. - Copy everything from the
sourcesfolder ofCCCOMA_X64FRE_EN-US_DV9to thesourcesfolder onWIN10, exceptinstall.wim.- The
install.wimfile is larger than 4GB and cannot be copied to a FAT32-formatted drive.
- The

Step 7: Split install.wim File
Since FAT32 cannot store files larger than 4GB, we need to split the install.wim file into smaller chunks.
Install Necessary Tools
- Install Homebrew (if you haven’t already) by running the following command in Terminal:
/bin/bash -c "$(curl -fsSL https://raw.githubusercontent.com/Homebrew/install/HEAD/install.sh)" - Install wimlib:
brew install wimlib
Split the install.wim File
Run the following command in Terminal (adjust the path as needed):
wimlib-imagex split /Volumes/CCCOMA_X64FRE_EN-US_DV9/sources/install.wim /Volumes/WIN10/sources/install.swm 4000- This command splits the
install.wimfile into multiple parts (install.swm,install2.swm, etc.), each 4GB or smaller. - Instead of manually typing the paths, you can drag the file or folder into the Terminal window to ensure the correct path is set.

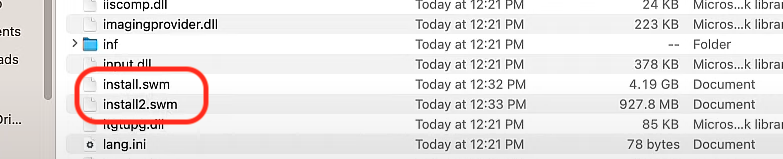
Step 8: Verify the Bootable USB Drive
- Open the
sourcesfolder inside theWIN10USB drive. - You should see
install.swmandinstall2.swminstead of the originalinstall.wim. - If these files exist, congratulations! Your USB drive is now bootable and ready to install Windows 10.
Conclusion:
By following these steps, you can successfully create a bootable Windows 10 USB drive using a Mac. This method is useful when installing Windows on a PC without access to a Windows machine. If you run into any issues, double-check your file paths and ensure the install.wim file is properly split.
You are now ready to install Windows 10 from your bootable USB drive!